

How To Repair Heatpress Shirt
Mistakes happen, information technology's part of life and part of crafting. When you make a mistake with iron-on HTV it can exist frustrating. I don't know almost you lot, but I hate wasting supplies, especially heat transfer vinyl! At that place are a few ways y'all can prepare a mistake, let'due south look at some examples and some ways to ready the mistakes.

Mistake/Fix # 1
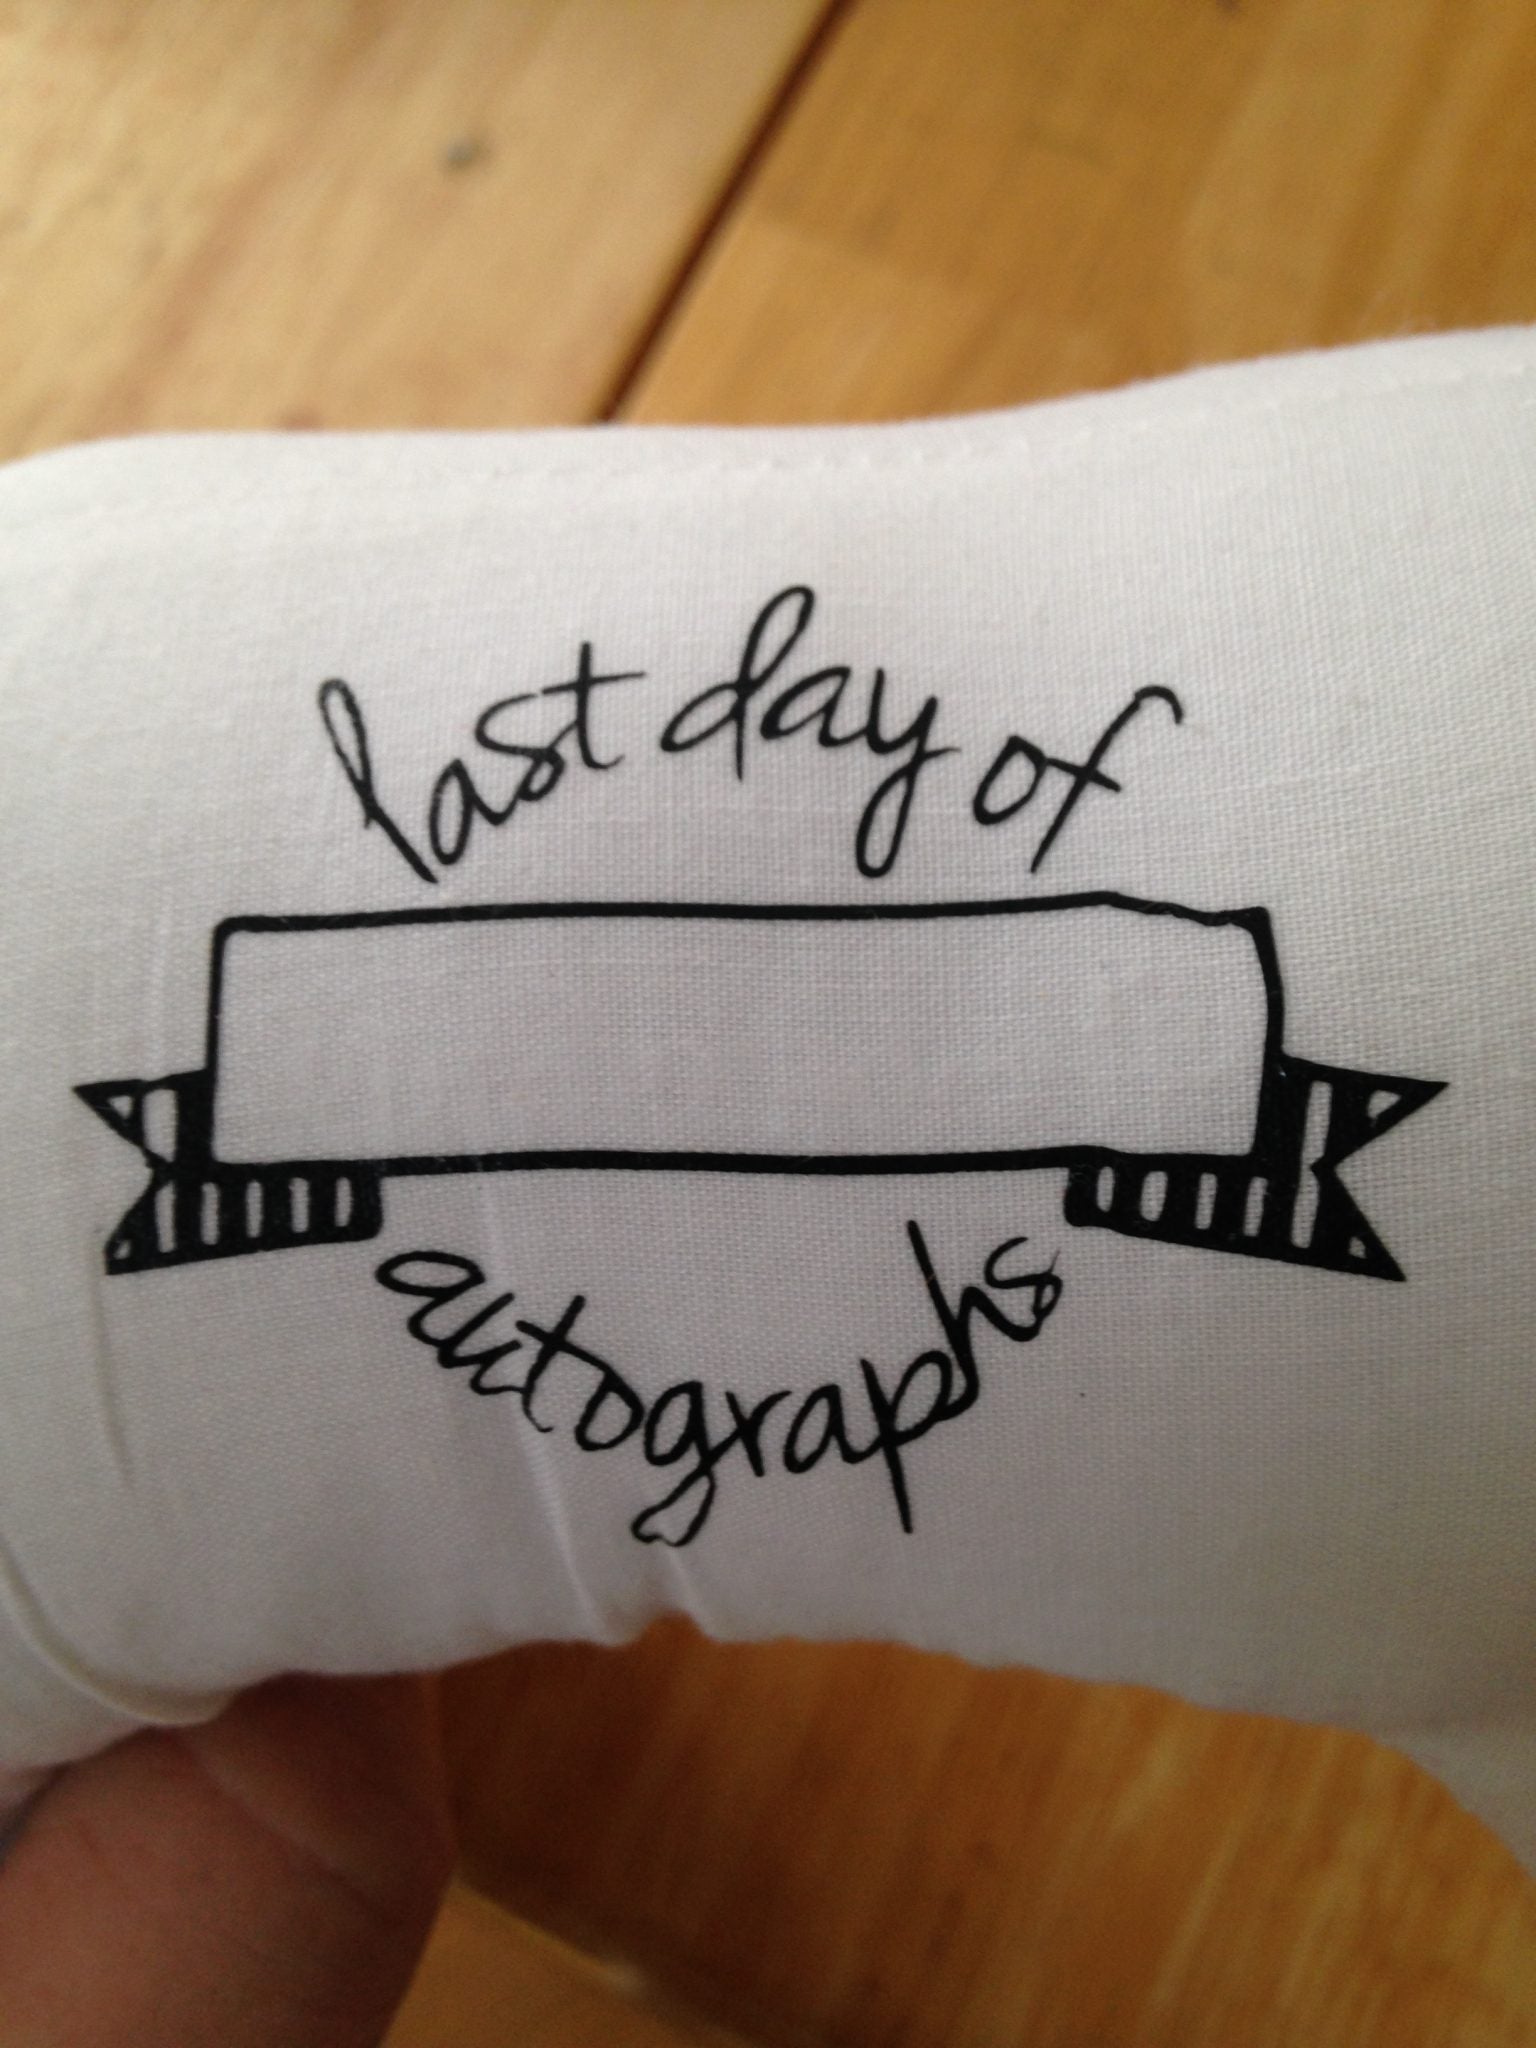
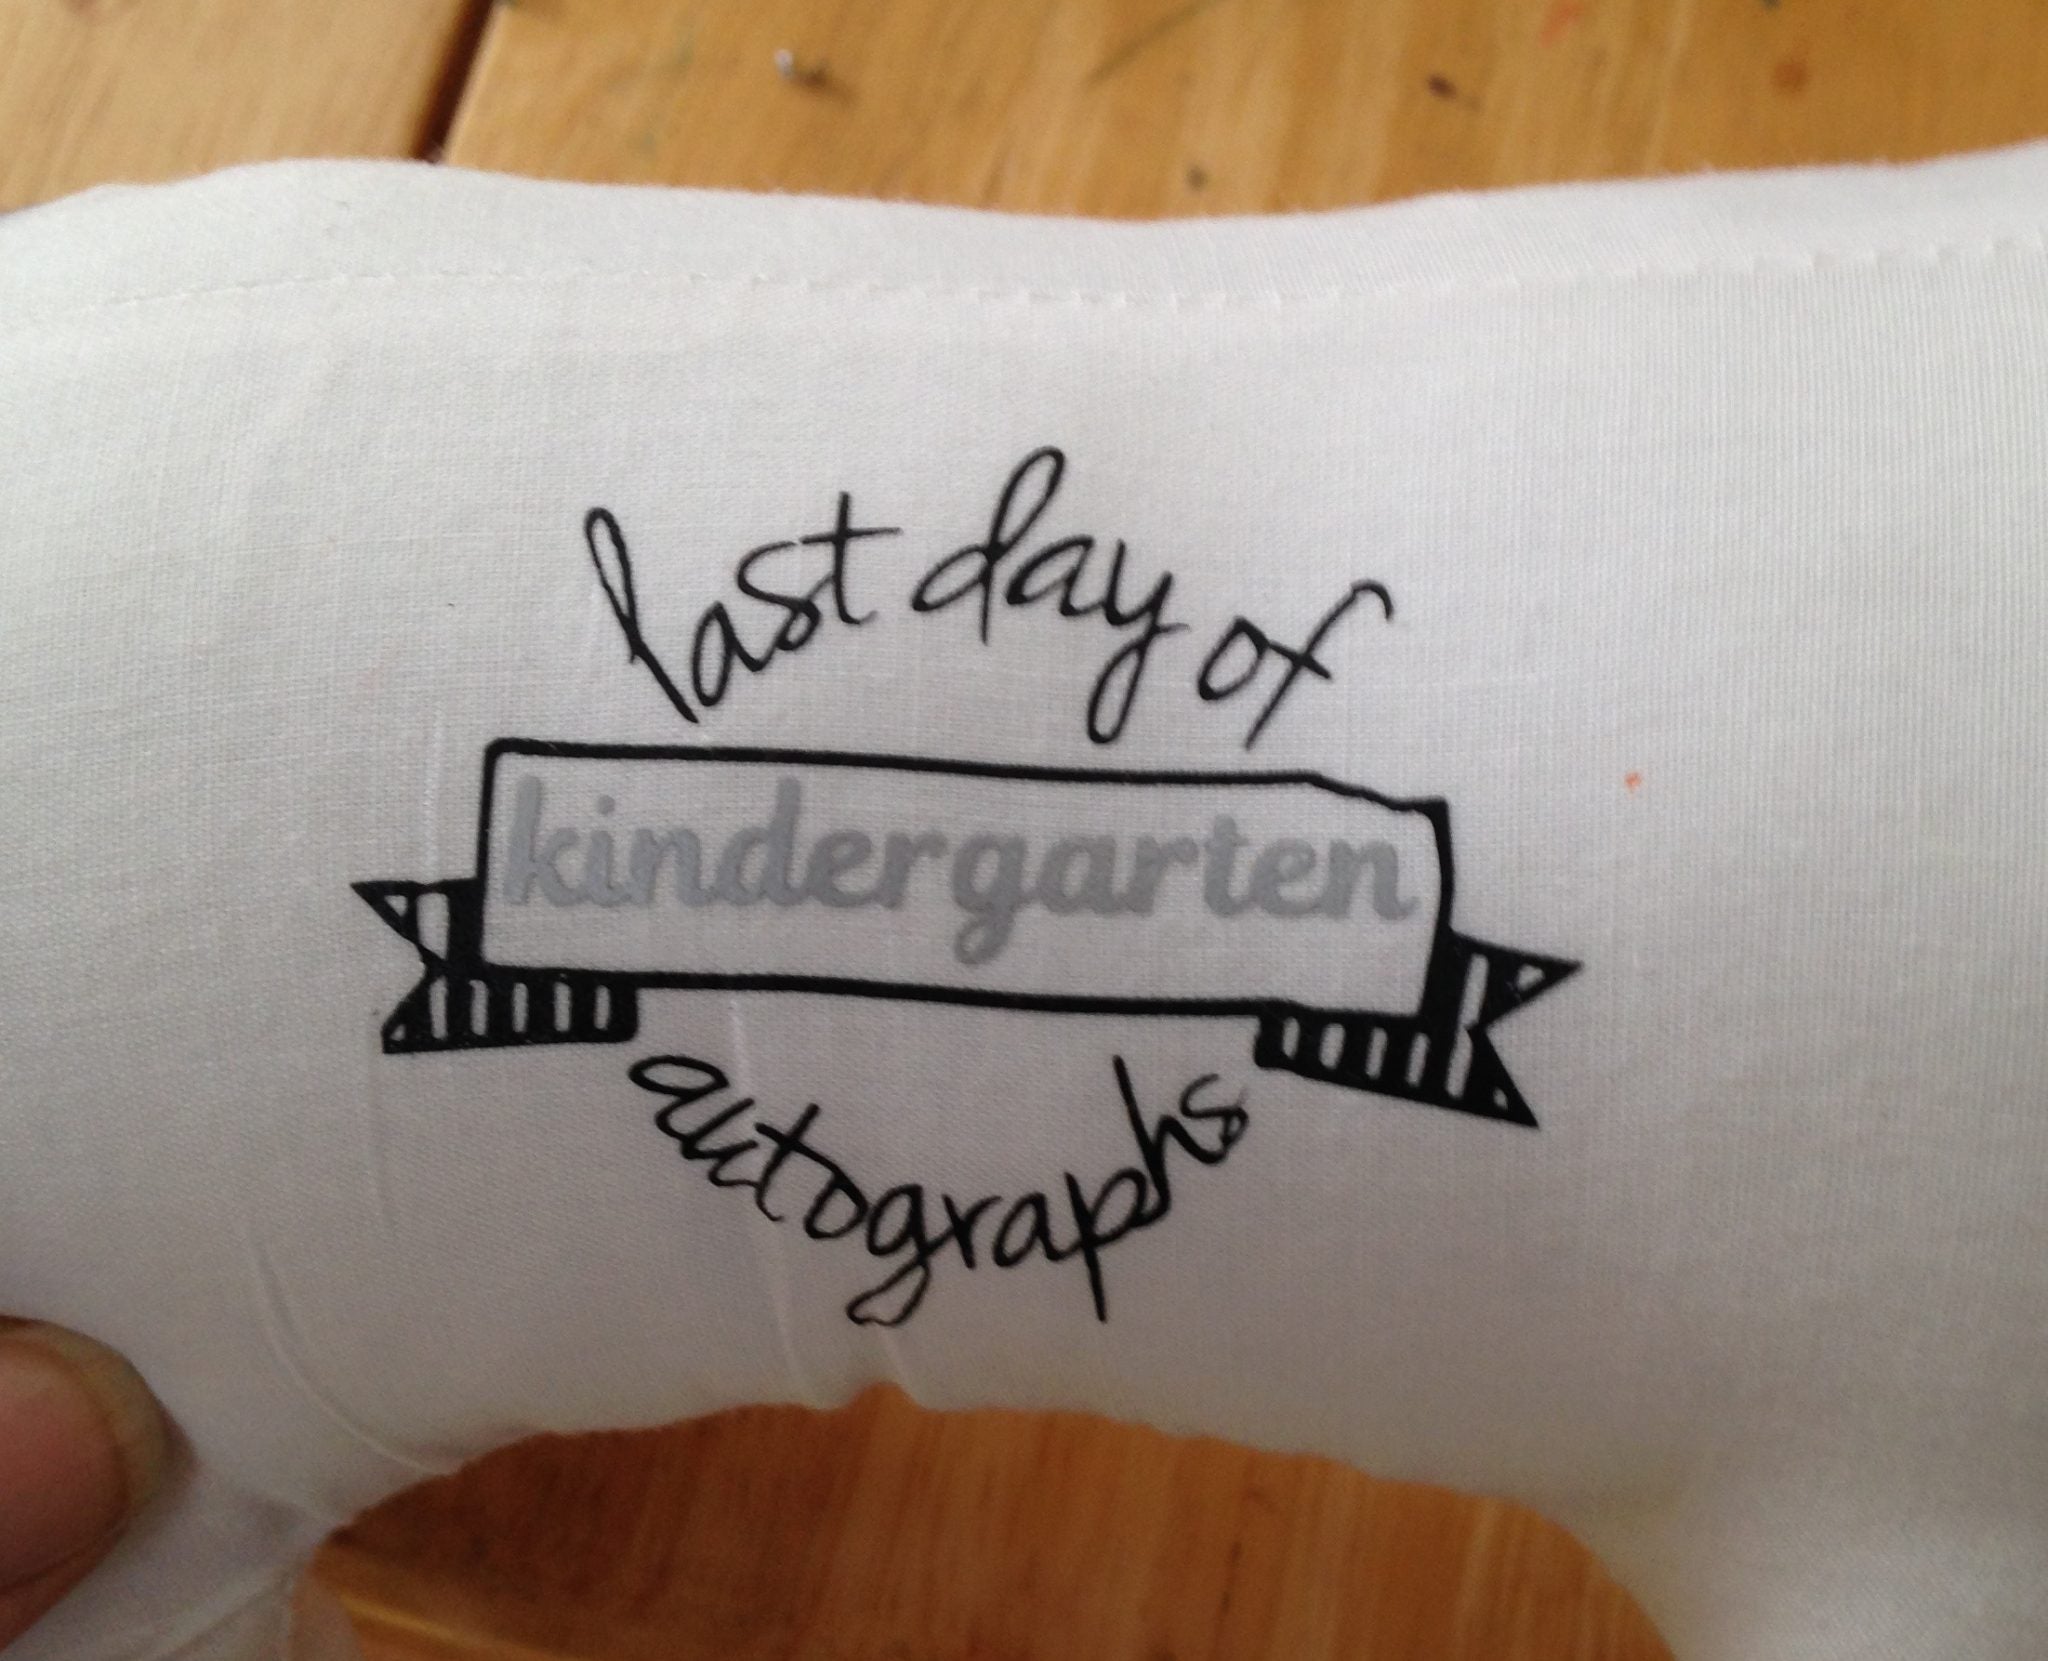
Let's take a expect at these cute last day of school autograph doggies I fabricated.

Bring along a few Sharpies and collect friends signatures, it's like a stuffed yearbook! As I was making these two, I had a slight mishap on the one canis familiaris.

Groan! The "kindergarten" layer shifted when I pressed the design and got all kinds of messed upwardly. No worries, we can fix it!
The first step to fix it is to estrus the design up again. On a plush stuffed creature like this, it isn't as easy as heating upwardly your iron and ironing information technology again (see beneath for a shirt set). Instead, I pulled out my trusty embossing rut tool.

Heat tools (aka embossing guns) are used to cook embossing powder (for paper crafting). My embossing gun has been used for that, just I've also used it to speed dry out paint, adhere vinyl onto surfaces and, yous guessed it, remove mistakes in heat transfer vinyl! Embossing guns are like super powered blow dryers, they get VERY hot (use circumspection). The thought with this technique is to heat upwardly the vinyl in sections and then option the blueprint off with tweezers. This is actually quite effective.

Go along the embossing gun at to the lowest degree a few inches away from the blueprint and gently heat it upwardly. Keep the heat moving and then you don't burn the stuffie. Selection off the design with a pair of tweezers.
I thought I might run into trouble when I pulled up the role that overlapped the border, but information technology came off without pulling up the blackness (yes!). Once the pattern has been removed, y'all tin can try that layering again. Much amend!
Fault/Fix #2
Our next mistake is a footling different. I made this beautiful photo anthology for a friend'south nuptials gift.

This album came with the aureate polka dots already printed on the album, they are some type of foil (I think). When I personalized the anthology with our sectional "Mr. & Mrs." heat transfer design, I was non expecting what happened when I pulled up the heat transfer carrier sheet.

Agh! When I removed the heat transfer carrier sheet, information technology pulled upward some of the gilded! Since this was not something I added to the album, I could not simply pull information technology off and endeavor it again. Instead, I opted to cover it up. This is some other trick yous tin can do to set up your heat transfer mistakes.
I measured the circles, they were 1″ and then I cutting some 1″ argent glitter rut transfer and covered that whoops up.

I stuck the silver glitter right over the damaged circle, covered the entire design with a tea towel and so pressed the album again. I added a few more glitter silver circles on the forepart and back of the album to brand information technology look intentional. Who says those silver circles weren't function of the plan (flash).


Mistake/Fix #3
The last fix was a mistake on a shirt. I missed a huge piece when weeding. I thought the design was pretty simple so I didn't expect at the design when I was weeding. Whoops….
The technique to fix this shirt is going to exist similar to the dog in a higher place. The goal here is to heat up the pattern again. I wrapped the shirt around my iron and heated the pattern upward from behind (which will loosen the adhesive on the HTV).
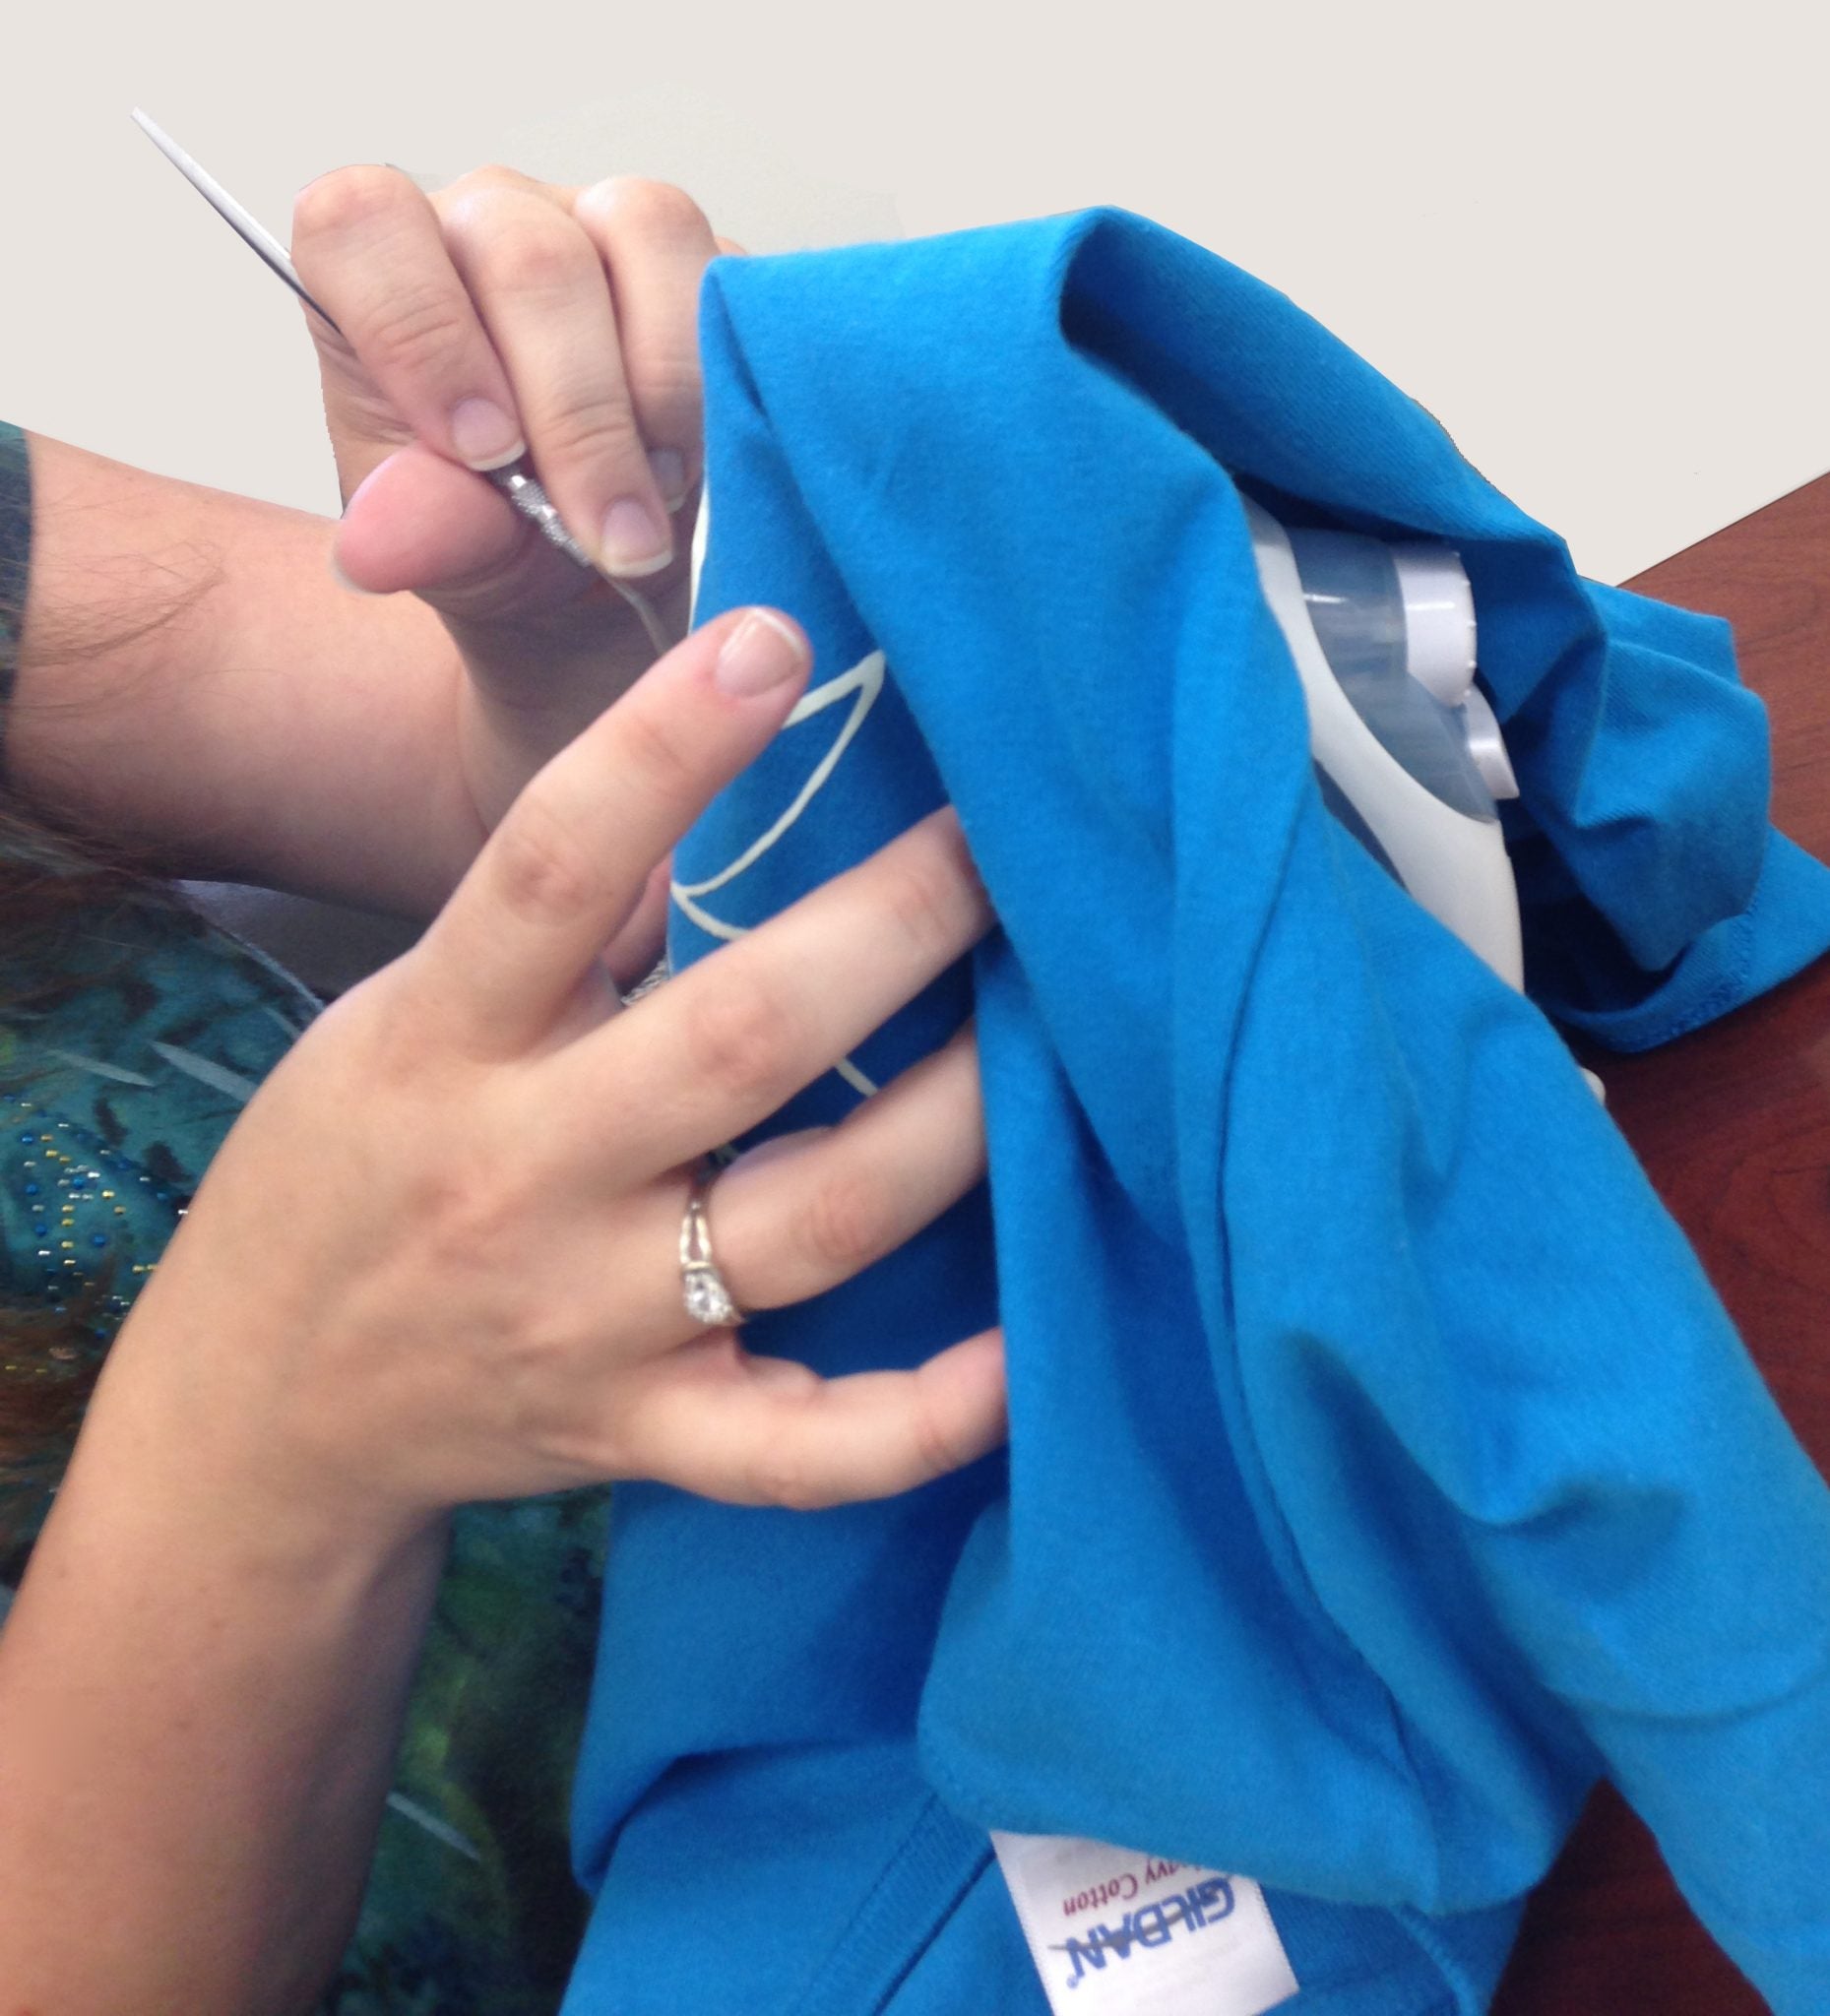
Concord the shirt around the iron (careful, it's hot), and piece of work apace. I used a metal hook tool and picked at the design until it started to come up.

One time I was able to get a corner of it up enough, I grabbed information technology quickly and pulled it off.

You can't even tell which petal I missed!


If you have other types of mistakes, such every bit forgetting to weed layered iron-on heat transfer vinyl HTV you lot tin can encompass the HTV with a piece the same colour as the groundwork and printing it right over the top. When you piece of work with smooth HTV, and printing a slice on superlative, you tin barely encounter the fix.
HTV remover might be helpful with this process too. It will help you get off any adhesive left backside.
I promise you never have to use these techniques, but if yous do, know that I've been there before too! We ALL make mistakes from time to time. You lot can totally fix it with a little know how. - Kala
![]()

How To Repair Heatpress Shirt,
Source: https://www.craft-e-corner.com/blogs/project-inspiration/how-to-fix-heat-transfer-vinyl-htv-mistakes
Posted by: hibblerackind.blogspot.com
0 Response to "How To Repair Heatpress Shirt"
Post a Comment